Beh, have stumped for Renthal 971 bars in black. Difficult to do as the existing bars are good, but I want to move on and get the bars on.
Will be ebaying the old bars, which I believe are unobtaneum Renthal Dakar bars. Also the Acerbis hand guards tho they are battle-worn. If you want then PM me.
'Tis the season to be spending money it seems, as I have also stumped for the Wilburs 640 shock. I was impressed enough with the range of questions they ask in order to build the shock, that I overcame my misgivings about the price. They ask about load (rider/luggage/passenger) and % of time with each and combos. Pretty good I thought, and made normally skeptical me think that maybe they do build the shock to spec and it's not all a bit of a gimmick.
Mr Lambeth recommends them so can't be bad.
Now hopefully I can stop dicking about and crack on with the engine and brakes.
Bazmonaut's 3AJ rebuild
-
cadno
- Almost there

- Posts: 775
- Joined: Fri May 06, 2016 9:38 am
- What Bike or Bikes Do You Own?: lot's of Yamahas, quite a few Montesas, two BMWs a KTM and a GPZ1100
- Previously Owned Bikes: Far too many to list
- Location: Bangor UK
Re: Bazmonaut's 3AJ rebuild
You've done the right thing with the Wilbers, lovely quality it sounds like you bought it off the UK distributor, they ask loads of questions.
The Renthal Dakar bar you're referring to is still available it's a 613 bend.
You've got to amass all the right bits before you can build the right bike
The Renthal Dakar bar you're referring to is still available it's a 613 bend.
You've got to amass all the right bits before you can build the right bike
-
bazmonaut
- On the ladder

- Posts: 68
- Joined: Mon Apr 06, 2015 9:10 pm
- What Bike or Bikes Do You Own?: 3AJ Tenere
- Previously Owned Bikes: Suzuki GS250
Yamaha XT250 (twin shock 1979)
Honda VF750
Suzuki GSXR1100
Yamaha SRX600 (twin shock)
KTM Duke 640
Honda ST1100 Police - Location: Devon, UK
Strippers
So, yesterday was supposed to be engine day, but I thought I'd just test my paint stripper to see if it still worked... it's proper dichloromethane-based stuff, ILLEGAL for individuals to purchase here in the UK. Lucky I already had some, isn't it?
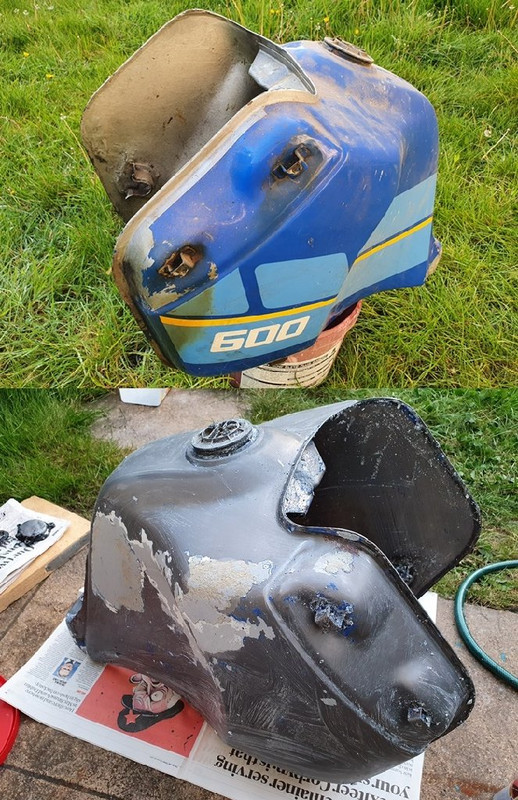
One thing led to another and then... the tank was stripped. I enjoy this kind of thing. It's like squeezing pimples: some people like a good squeeze and others don't. I do, so there.
Took maybe 4 hours total, but I also did other things during this time as it was a cycle of applying the stripper, waiting 15 mins for it to bubble the paint, scrape the paint with a platic scraper and then 'buff' with a piece of stainless steel wool. Repeat. I had plenty of cider so the work seemed to go quickly. The stainless wool worked really well, as the scraper leaves big blobs of softened paint which get in the way of the next application of stripper. 'Buffing' with the stainless wool removed more paint and also got rid of those unsightly blobs.
There are patches of filler on both sides that I am going to strip to see what lies beneath. The slow leak/staining on the left side of the tank (visible in the pic below) did not have a dent associated with it, which is good as it means it's likely just a pinhole that will be fixed when I seal the inside of the tank.
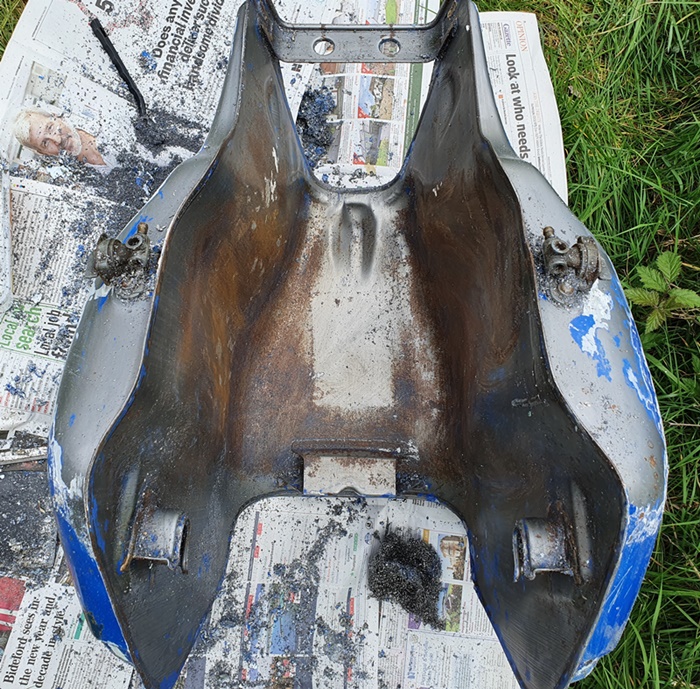
The underneath has loads of surface rust, nothing too deep. It explains why this was painted silver: not as a reflective surface more likely to reflect heat from the engine, but as a bodge to cover this rust. Poor. I will be removing the rust before painting, it's not hard to do.
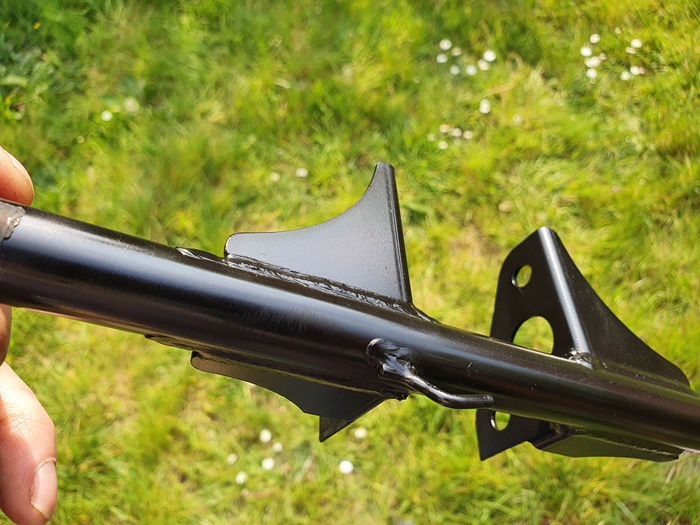
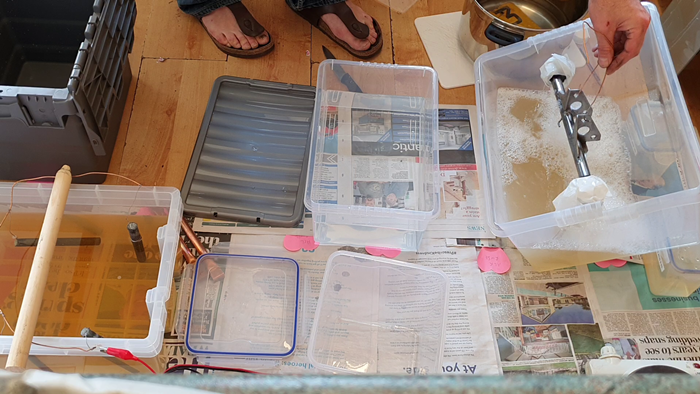
And in other news I have plated the tank support bar. This was a bit of an experiment, and while the results are good as you can see below, it was a LOT of bother. I am still tidying up my kitchen. It was a lot of work to set up the (temporary) larger tanks and make up more of every solution. My normal tanks are suited to nuts and bolts and smaller parts and fit easily on a spare countertop in my kitchen: having to set up to plate larger parts was a big effort.
I have also straightened and painted the front subframe, and the battery box. I was going to plate the battery box but decided that painting was much easier! Also, it is originally painted, so back to painted it will go. Will post some pics of the straightening process, involving firm but controlled application of pressure via car jacks, long levers, and bench vices.
One thing led to another and then... the tank was stripped. I enjoy this kind of thing. It's like squeezing pimples: some people like a good squeeze and others don't. I do, so there.
Took maybe 4 hours total, but I also did other things during this time as it was a cycle of applying the stripper, waiting 15 mins for it to bubble the paint, scrape the paint with a platic scraper and then 'buff' with a piece of stainless steel wool. Repeat. I had plenty of cider so the work seemed to go quickly.
The stainless wool worked really well, as the scraper leaves big blobs of softened paint which get in the way of the next application of stripper. 'Buffing' with the stainless wool removed more paint and also got rid of those unsightly blobs. There are patches of filler on both sides that I am going to strip to see what lies beneath. The slow leak/staining on the left side of the tank (visible in the pic below) did not have a dent associated with it, which is good as it means it's likely just a pinhole that will be fixed when I seal the inside of the tank.
The underneath has loads of surface rust, nothing too deep. It explains why this was painted silver: not as a reflective surface more likely to reflect heat from the engine, but as a bodge to cover this rust. Poor. I will be removing the rust before painting, it's not hard to do.
And in other news I have plated the tank support bar. This was a bit of an experiment, and while the results are good as you can see below, it was a LOT of bother. I am still tidying up my kitchen. It was a lot of work to set up the (temporary) larger tanks and make up more of every solution. My normal tanks are suited to nuts and bolts and smaller parts and fit easily on a spare countertop in my kitchen: having to set up to plate larger parts was a big effort.
I have also straightened and painted the front subframe, and the battery box. I was going to plate the battery box but decided that painting was much easier! Also, it is originally painted, so back to painted it will go. Will post some pics of the straightening process, involving firm but controlled application of pressure via car jacks, long levers, and bench vices.
-
Mezo

- Dashingly Handsome

- Posts: 6108
- Joined: Wed Mar 23, 2011 11:01 am
- What Bike or Bikes Do You Own?: Kymco agility 125 ;-)
- Previously Owned Bikes: Honda SS50, Suzuki TS50, Honda CB100, Honda CR125RZ, Yamaha YZ125, Kawasaki KX250, Suzuki TL1000S, Ducati 900SS, Ducati 900SL, a few Tenere`s.
- Location: Queensland Australia
- Contact:
Re: Bazmonaut's 3AJ rebuild
I remember stripping mine, so much quicker. 


Mezo.
Mezo.
"A wise man makes his own decisions, an ignorant man follows public opinion"
-
Mezo
- Dashingly Handsome
- Posts: 6108
- Joined: Wed Mar 23, 2011 11:01 am
- What Bike or Bikes Do You Own?: Kymco agility 125 ;-)
- Previously Owned Bikes: Honda SS50, Suzuki TS50, Honda CB100, Honda CR125RZ, Yamaha YZ125, Kawasaki KX250, Suzuki TL1000S, Ducati 900SS, Ducati 900SL, a few Tenere`s.
- Location: Queensland Australia
- Contact:
Re: Strippers
Now that has come out superb.

Mezo.
"A wise man makes his own decisions, an ignorant man follows public opinion"
-
cadno
- Almost there
- Posts: 775
- Joined: Fri May 06, 2016 9:38 am
- What Bike or Bikes Do You Own?: lot's of Yamahas, quite a few Montesas, two BMWs a KTM and a GPZ1100
- Previously Owned Bikes: Far too many to list
- Location: Bangor UK
Re: Bazmonaut's 3AJ rebuild
Which plating kit are you using Baz?
Very tempted to get my own while we are on restriction
Very tempted to get my own while we are on restriction
-
bazmonaut
- On the ladder
- Posts: 68
- Joined: Mon Apr 06, 2015 9:10 pm
- What Bike or Bikes Do You Own?: 3AJ Tenere
- Previously Owned Bikes: Suzuki GS250
Yamaha XT250 (twin shock 1979)
Honda VF750
Suzuki GSXR1100
Yamaha SRX600 (twin shock)
KTM Duke 640
Honda ST1100 Police - Location: Devon, UK
Re: Bazmonaut's 3AJ rebuild
I get my kits from www.classicplating.co.uk, highly recommended.
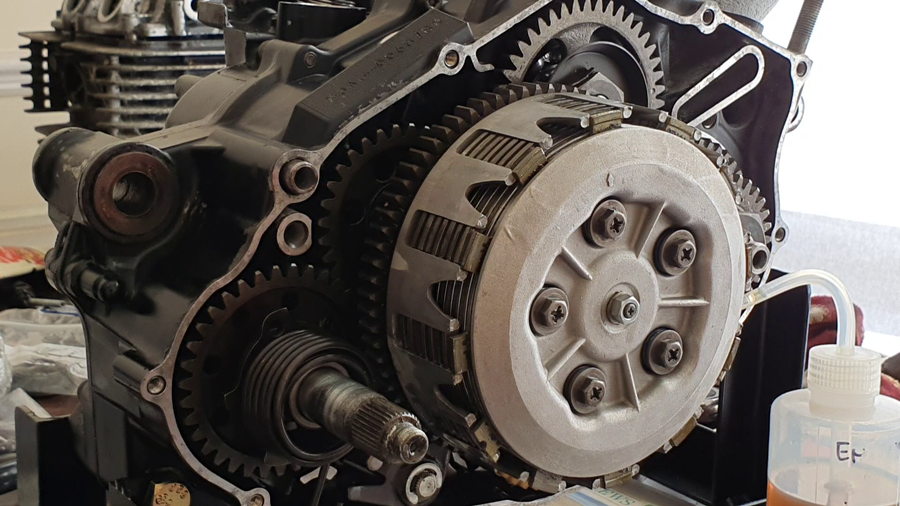
Engine building today. Clutch side done. Some small challenges as I have several engines in bits and had to go hunting through boxes for different bits, and compare them to images found on google.
I will need to make up a post to hold the kick-start spring, as this is a 3AJ and I'm fitting a kickstart to it.
Couple of questions for you guys though...
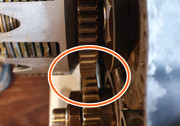
The gears of the primary drive (crankshaft) and the gear on the clutch basket are not perfectly aligned. Should I be worried?
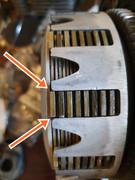
The last clutch friction plate looks perilously close to the ends of the tines on the clutch basket. Not sure how much support the clutch basket is going to give the friction plate...
-
cadno
- Almost there
- Posts: 775
- Joined: Fri May 06, 2016 9:38 am
- What Bike or Bikes Do You Own?: lot's of Yamahas, quite a few Montesas, two BMWs a KTM and a GPZ1100
- Previously Owned Bikes: Far too many to list
- Location: Bangor UK
Re: Bazmonaut's 3AJ rebuild
Which kit did you go for?
Zinc, zinc nickel or nickel?
The Yam RD boys go nuts for the olive passivate, I'm fairly sure most commercial places won't do the olive anymore.
Zinc, zinc nickel or nickel?
The Yam RD boys go nuts for the olive passivate, I'm fairly sure most commercial places won't do the olive anymore.
-
scottieh
- Financial

- Posts: 796
- Joined: Wed Mar 30, 2011 3:58 am
- What Bike or Bikes Do You Own?: 1988 XT600Z 3AJ
1987 XT600Z 1VJ
1985 XT 600
1980 TT500
1980 XT250
2001 KTM 300XC - Previously Owned Bikes: 1982 XT550
1981 TT250
1989 Yamaha Virago 750
1994 DR650
1980 Suzuki GR650
1997 KLR 250
1986 Honda Spree - Location: Salt Lake City
Re: Bazmonaut's 3AJ rebuild
Don’t take my word as gospel on this but I think that small gap is why my transmission had an extra washer after the circlip. Part number 90201-20276-00bazmonaut wrote: Sun Apr 26, 2020 8:42 pm
Couple of questions for you guys though...
The gears of the primary drive (crankshaft) and the gear on the clutch basket are not perfectly aligned. Should I be worried?
Number 19 on the diagram.

Unless I’m thinking of the wrong transmission drive...
Was there any back and forth play in the primary drive once the cases were together?
-
bazmonaut
- On the ladder
- Posts: 68
- Joined: Mon Apr 06, 2015 9:10 pm
- What Bike or Bikes Do You Own?: 3AJ Tenere
- Previously Owned Bikes: Suzuki GS250
Yamaha XT250 (twin shock 1979)
Honda VF750
Suzuki GSXR1100
Yamaha SRX600 (twin shock)
KTM Duke 640
Honda ST1100 Police - Location: Devon, UK
Re: Bazmonaut's 3AJ rebuild
Thanks for the suggestion scottieh, however my 3AJ also has that extra washer and it definately went in. Also there is no play in any of the shafts. Am not too worried, but I do have a complete 3TB I might pull the side cover off to check...scottieh wrote: Mon Apr 27, 2020 3:38 pm Don’t take my word as gospel on this but I think that small gap is why my transmission had an extra washer after the circlip.
Was there any back and forth play in the primary drive once the cases were together?
I put some info in a previous post in this thread. I'm using zinc + black chromate passivate for the black parts.
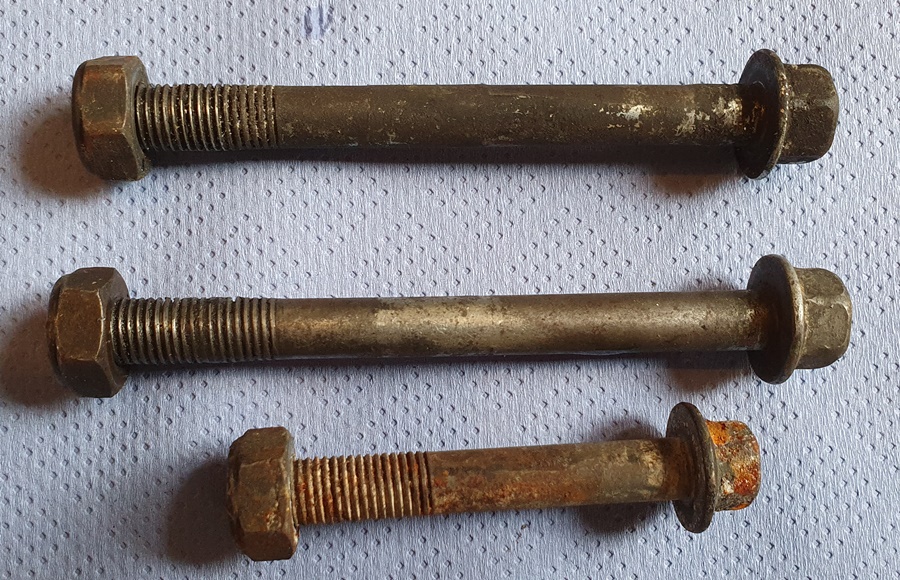
On that topic, the fruits of last night's plating session... I think I'm running out of stuff to plate.
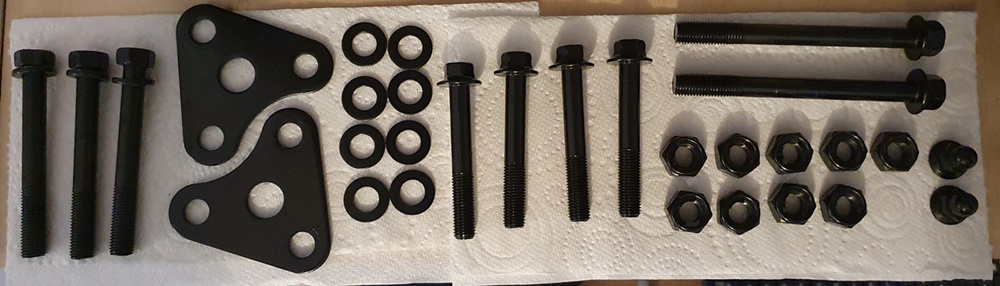
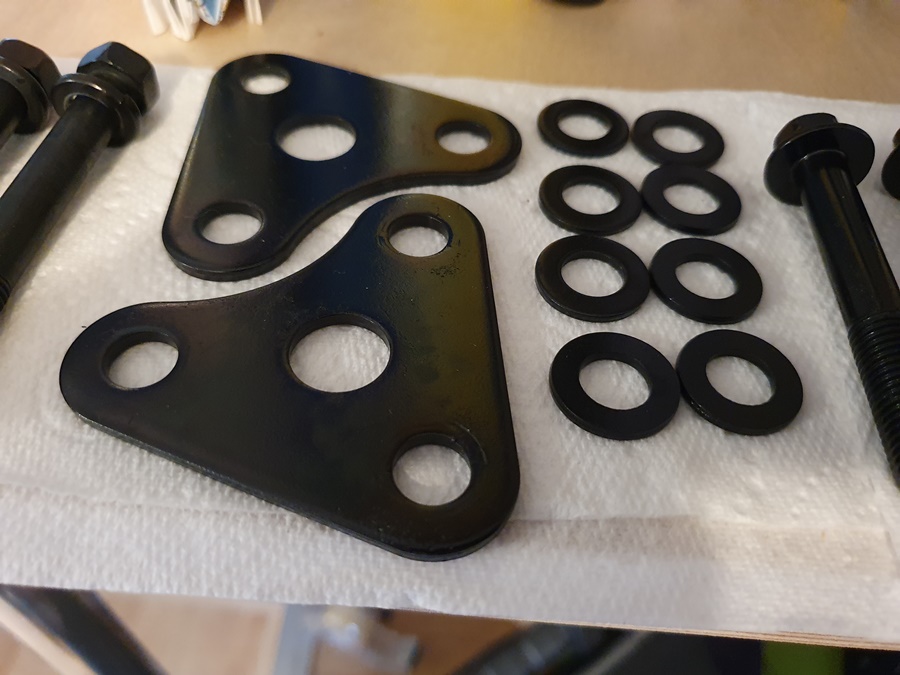
'Before' pic below.