Page 5 of 6
Re: A 3AJ Rebuild getting ready for Sandraiders 2026
Posted: Mon Dec 01, 2025 2:52 pm
by firestarter_phil
Re: A 3AJ Rebuild getting ready for Sandraiders 2026
Posted: Mon Dec 01, 2025 6:01 pm
by charliext1vj
Loving this!
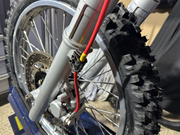
is the front hose the wrong way round in my opinion the hose should appear vertical from the banjo to the fork clamp. But as always happy to be wrong :-)
Re: A 3AJ Rebuild getting ready for Sandraiders 2026
Posted: Mon Dec 01, 2025 6:30 pm
by firestarter_phil
I am certainly not against the idea of turning it around the other way. That’s why we have this forum…….it let’s the informed help the less informed.
Currently it works, which is as much as I can hope for!
Re: A 3AJ Rebuild getting ready for Sandraiders 2026
Posted: Mon Dec 01, 2025 6:50 pm
by firestarter_phil
Re: A 3AJ Rebuild getting ready for Sandraiders 2026
Posted: Mon Dec 01, 2025 9:46 pm
by charliext1vj
https://advlife.com.au/vintage-yamaha-t ... id=1&pid=1
The brake hose should go behind the fork with speedodrive.
when comparing the above link it looks a little back and a little high near the speedo which amy be the alignment issue - but sorry no experience in this.
great work!
Re: A 3AJ Rebuild getting ready for Sandraiders 2026
Posted: Tue Dec 02, 2025 3:04 pm
by firestarter_phil
I will have a look at the brake lines shortly.
In the meantime it was time to get out for a bit of a shakedown ride!!
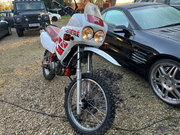
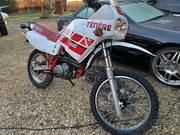
Although, typically the weather is 'British'
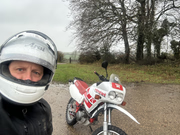
So far, so good!!
Re: A 3AJ Rebuild getting ready for Sandraiders 2026
Posted: Tue Dec 02, 2025 11:27 pm
by firestarter_phil
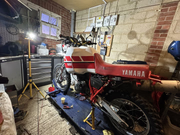
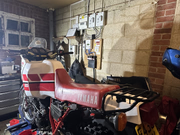
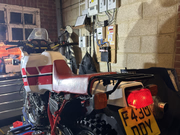
Now the 3AJ is up and running and has had its first shakedown rides, I thought it would be useful to summarise what’s actually been done to the bike so far in preparation for Sandraiders 2026.
Front end
• Forks stripped, powder coated and rebuilt with YSS front suspension internals.
• New fork bushes and seals throughout.
• Top yoke and associated parts refinished.
Frame & Swingarm
• Frame sandblasted and powder coated (red), rebuilt with new headstock bearings.
• Swingarm & linkage
• Swingarm blasted and powder coated (bright silver).
• All swingarm bushes and roller bearings replaced.
• Shock linkage stripped, powder coated and rebuilt with new bushes and roller bearings.
Rear shock
• Original shock retired in favour of a new YSS rear shock.
Engine
I started thinking I’d just “have a quick look at the top end” and, as usual, that escalated…
• Top & bottom end work
• New Wiseco piston and rings.
• All main bearings and other critical bearings replaced.
• 5th gear pair replaced with new parts after the originals were found to be well past their best and the oil strainer full of metal confetti.
• Oil pick-up/strainer fully stripped and cleaned, tangs opened and all debris removed.
• New EBC heavy-duty clutch and plates.
• New cam chain and cam chain guides.
• Head skimmed and valves re-seated by a local machine shop.
• Barrel and head re-painted black with VHT to tidy things up.
• New carb inlet rubbers.
• Oil system
• New oil pipes made up and fitted with Aeroquip-style fittings.
Fuel Tank & Bodywork
Tank
• Original fuel tank repaired and welded, then stripped and repainted in the correct scheme.
Top fairing & plastics
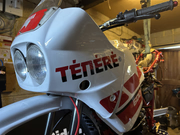
• Top fairing plastic welded and repaired before repaint.
• Panels prepped and painted at home using a “greenhouse”/DIY booth and then decals and lacquer applied.
• Side panel decals missing so left white given the bike is likely to be thrown down a Moroccan piste at some point.
• Seat is still on the “to do” list for a re-cover, currently running the original cover.
Controls & Footrests
• Footpeg hangers powder coated.
• Fitted with extra-wide off-road footpegs for a bit more comfort and control in the rough stuff.
Brakes
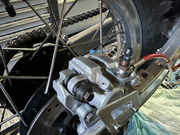
• Front and rear brake calipers stripped, powder coated and fully rebuilt using BrakeMasters seals and pistons.
• New brake pads all round.
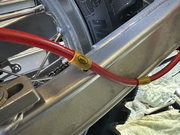
• HEL braided brake lines front and rear, with stainless banjo bolts.
• Original master cylinders retained for now (functionally good and keep the OEM look).
Wheels, Tyres & Final Drive
Wheels
• Rims and hubs completely stripped.
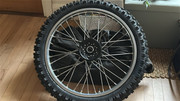
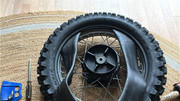
• Rims powder coated in a “chrome” finish and laced to black hubs.
• Rebuilt with custom 4 mm stainless spokes front and rear by Salisbury Wheel Builders.
• New wheel bearings and seals fitted at the same time.
• Shod with Michelin Tracker tyres front and rear with Michelin 4 mm tubes (to be swapped to mousses for the event).
Gearing & chain
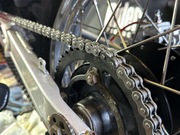
• New stock gearing: 15/45 front and rear sprockets.
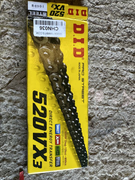
• DID 520VX3 chain fitted.
Electrics & Wiring
• Tracked down a spark issue back to the CDI/generator wiring and used that as an excuse to go through the loom.
• All dodgy wiring and connectors replaced.
• Switched over to modern, sealed multi-pin AMP-type connectors in key areas for reliability, accepting this sacrifices some “plug-and-play” interchangeability in favour of waterproofing and robustness.
⸻
There are still a few jobs on the nice-to-have list (seat cover, possible future brake upgrade, etc.), but as it stands the bike is now a fully rebuilt, refreshed 3AJ with modern suspension, rebuilt motor, sorted wheels and brakes, and electrics I can trust.
First shakedown rides are done – in classic British weather – and so far, so good. Looking forward to finishing the last few details and then getting some proper miles on it before Morocco.
Thank you everyone who helped me when I got stuck…..couldn’t have done this without you and this forum and happy to help anyone else in the future
Re: A 3AJ Rebuild getting ready for Sandraiders 2026
Posted: Wed Dec 03, 2025 1:55 am
by tysonoak
I've got a 1986 1VJ I am currently riding in Texas but I also bought with it a 1988 3AJ along with it. When I get around to rebuilding it, this thread will be of great help! Well done on putting this one back together. I believe it is actually the same bike that is one the home page for this forum!
Re: A 3AJ Rebuild getting ready for Sandraiders 2026
Posted: Wed Dec 03, 2025 10:39 pm
by charliext1vj
Hopefully I am not over thinking this for you....The regulator is normally installed on the back of the battery box. It fits there for both its earthing but also the box acts as a heat sink for the regulator. Yours looks like it would struggle there?
Its looking good and I guess the shake down will be looking for the weak spots - i.e. wear of cable loom by oil cooler and where it folds by the front mudguard. Still question your brake line routes they like rock bungees :-)
Impressed and envious!
Re: A 3AJ Rebuild getting ready for Sandraiders 2026
Posted: Fri Dec 05, 2025 7:35 pm
by firestarter_phil
I like the idea of the rectifier on the battery box. I just put it back from where it came, but I didn't think it was in the right place.
Will review over the weekend